Homepage → Seed Saving Information → Saving Corn Seed
Saving Corn Seed
Planted November 10, 2024
Reading time: 9 minutes
by Mike Dunton
Until the mid-20th century, raising a seed crop of corn was a very common farming practice. This resulted in the creation of many heirloom corn varieties, adapted to specific climates and markets. Modern large scale farming operations have replaced seed saving by annually purchasing their seed from the mainstream seed industry; usually genetically engineered or F1 hybrid varieties. There is no reason why you cannot produce your own seed supply and become that much more self-reliant.
Production:
If you are raising corn, Zea mays, with the intent of producing your own, high quality seed, there are additional considerations to make when planning your grow out.
Firstly, you will want to make sure that the variety that you are planting is an older, open-pollinated variety. Seed saved from modern unstable F1 hybrids and genetically engineered corn varieties do not come true-to-type. That is, the generation grown from saved seed will not look like the parent. This is not to say that the seeds won’t grow. It just means that you don’t know what you will end up with as you do when you are working with open-pollinated varieties.
The second consideration for saving corn seed is the number of plants (stalks) that you grow. Corn is particularly susceptible to “inbreeding depression” which will result in your seed supply getting progressively worse over a few generations of saving seed. Ideally, you need to grow at least 200 plants; 100 at the absolute minimum. From the 200 plants, identify about half that are the best specimens, the truest-to-type, and save your seed from those ears. This will help you maintain the true diverse makeup of the variety, and the strongest, healthiest seed. As a side note, if you observe “off-type” stalks, there is no need to remove the plant, merely remove the tassel before it matures, and do not use the ear for seed.
Finally, it is very important to ensure proper isolation from any other corn varieties. Keep in mind that ALL varieties of corn – whether sweet, flint, dent, flour, or popcorn – will all cross with one another.
For general information on how to grow corn, refer to our article entitled, “Tips for Growing Corn.”
Isolation:
Distance Isolation: Corn is a plant that requires no insects to complete its sexual reproductive cycle. It has developed to use the wind to distribute mature pollen from the plant’s male flower (the tassel) to the female structures of surrounding plants (the silks and developing ears). Every single kernel of corn is the result of one corn silk becoming pollinated.
Depending on the weather conditions (temperature, %RH, and wind), as well as the geographical features, pollen can travel great distances and still remain viable. For this reason, to maintain the genetic purity of a variety, different varieties should be isolated from each other by up to two miles in wide open terrains, a mile or so in areas sheltered by obstructions such as hills or forests.
Time Isolation: If you still wish to grow more than one variety and save seed, it is possible to isolate them by time. This requires a long, moderate growing season, and an early maturing and late maturing variety. As long as the two stands are grown far enough apart that mechanical contamination is not an issue, and the early maturing variety’s tassels and silks have dried up before the late variety reaches reproductive maturity, you should be o.k.
Hand Pollination: This process is beyond the scope of this article. If you are like me, you always have a huge list of work to do around the homeplace during the summer months, and you do not need another task. The process is not particularly difficult. It just takes some learning, planning, specialized supplies, practice, and a good amount of time. If you cannot raise your crop in isolation from other corn varieties, or if you absolutely want to raise more than one variety and save seed, then hand pollination is necessary.
In broad terms, you must carefully isolate developing ears, using special shoot bags, one to two days before their silk emerges. On the morning that you plan to pollinate, using tassel bags, isolate the tassels and around mid-day, take the pollen that has collected, sprinkle on the silks, replace their bags. This process is repeated every day, as more ears reach the stage that their silks are preparing to emerge. It should be noted, that if any silks emerge before you get them bagged, they will already have pollinated and the ear cannot be used for seed.
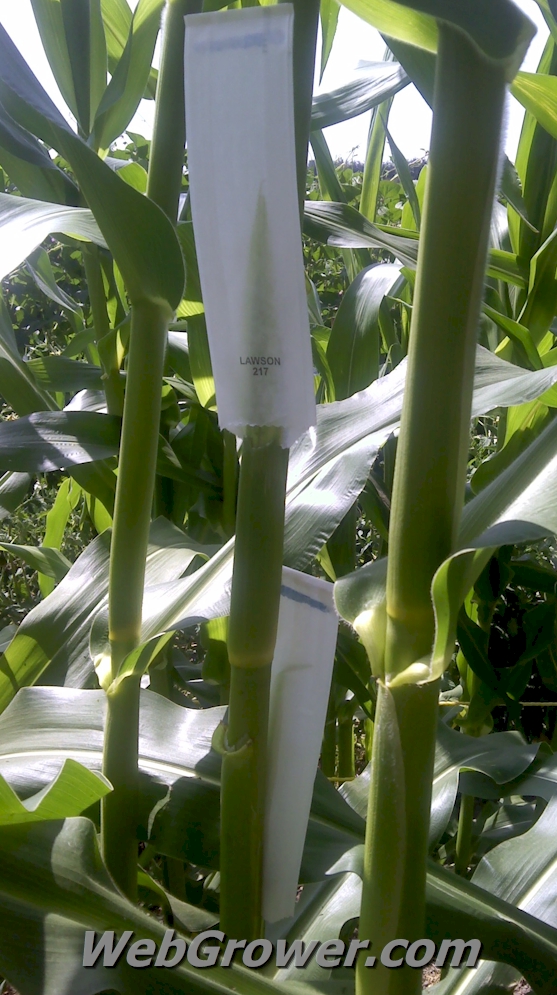
Figure 1: Corn shoot bags covering developing ears.
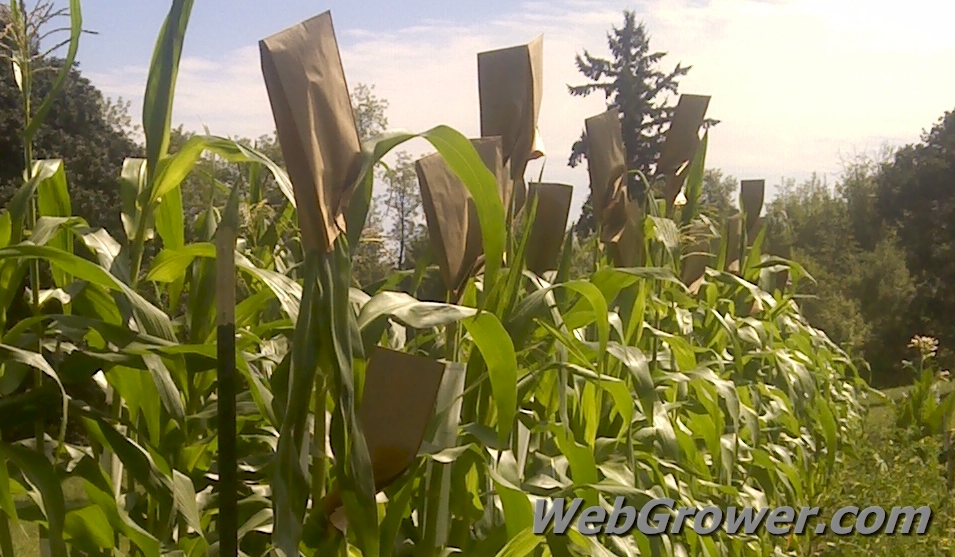
Figure 2: Corn tassel bags covering the plant’s male flowers, the tassels.
Selection:
Throughout the growing season, as you cultivate your garden, observe your stand for off-type plants. That is, stalks that look diseased or different from the main population. It is recommended to remove and destroy any disease immediately. Off-types can either be removed, or marked and tassels removed as noted above. Off-types cannot be allowed to pollinate your good plants, nor should their ears be used for seed.
During harvest, select the best examples, from at least 50 of your best plants, and mix the kernels from those ears to create your seed supply. This last step is part of the efforts to maintain the genetics of the variety and to prevent inbreeding depression.
Harvest:

Figure 3: In a perfect growing season, you will be able to leave your corn in the field until it has dried down on the stalk as in this photo.
As you can probably guess, the first step in harvesting your seed crop is to remove the ears from the stalks. Ideally, you can leave them on the stalks until completely dry. This is a rarity for those of us here in the Pacific Northwest. If your weather forecast is looking like it is going to start getting wet, or if you are having problems with insects or animals, you can harvest mature ears, husk them, and get them drying indoors.
Even when we have a year where the ears are able to dry on the stalks, we still get them shucked and under cover in a location with good airflow, where they can finish drying. I typically bring them into a building, a garage works great, spread them out on drying screens, and then situate fans to blow air across them until they are bone dry.
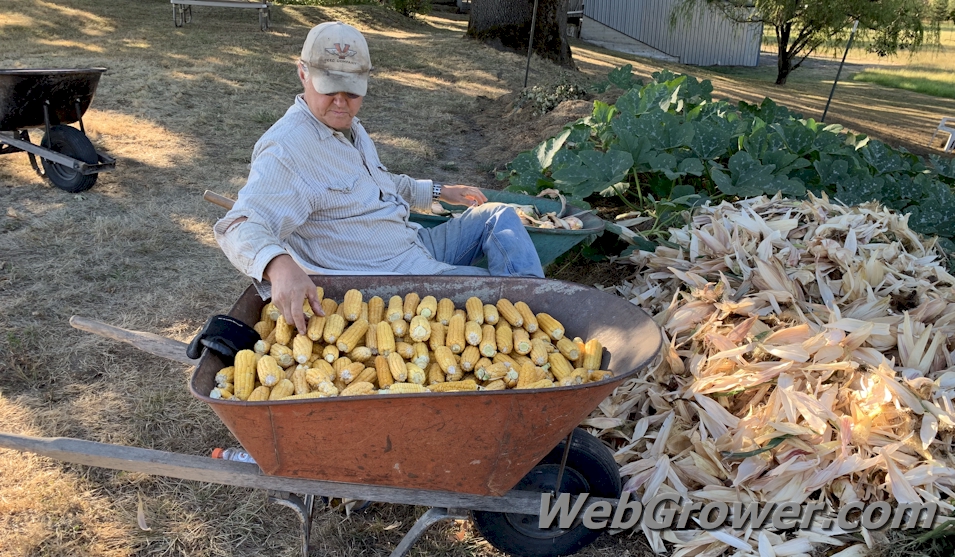
Figure 4: The author shucking ears of corn. Shucking is the name used to describe the process of simply removing the corn husks from the ears. The corn husks are added to the compost pile, and the ears are moved indoors to complete the drying process.
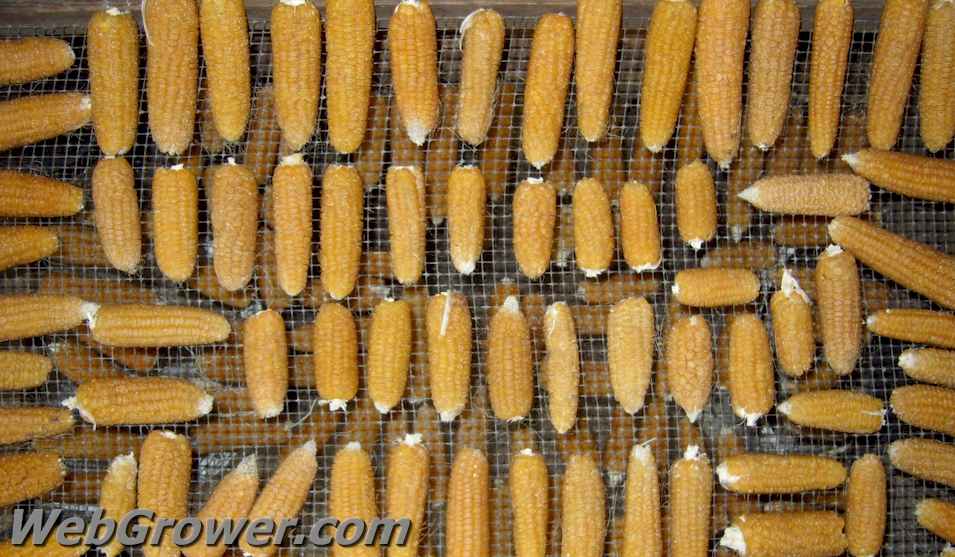
Figure 5: Shucked corn ears drying on a screen.
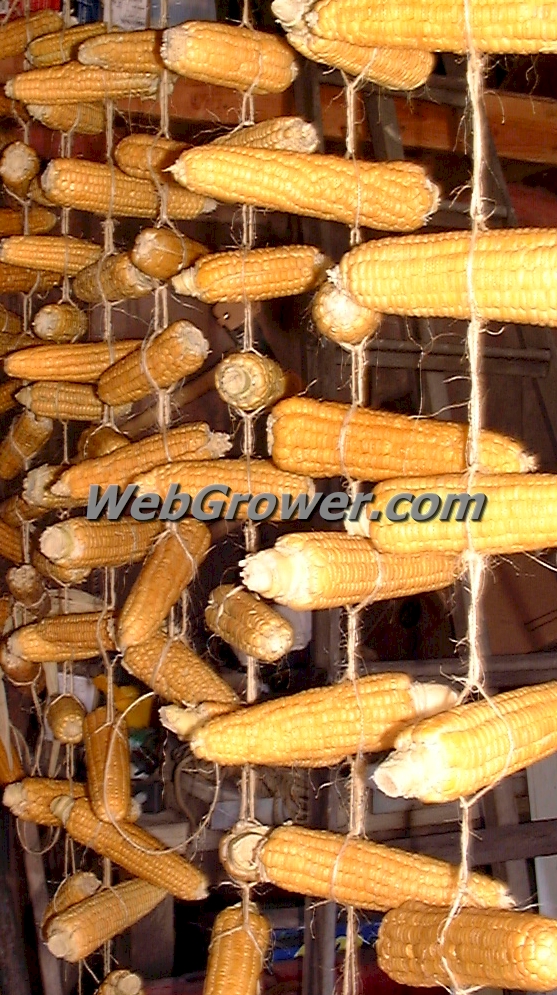
Figure 6: If you don’t have access to drying screens, you can use twine to hang the ears to dry.
Once the kernels and cobs are completely dry, they can be removed from the cob. This process is called shelling and can be accomplished by several methods.
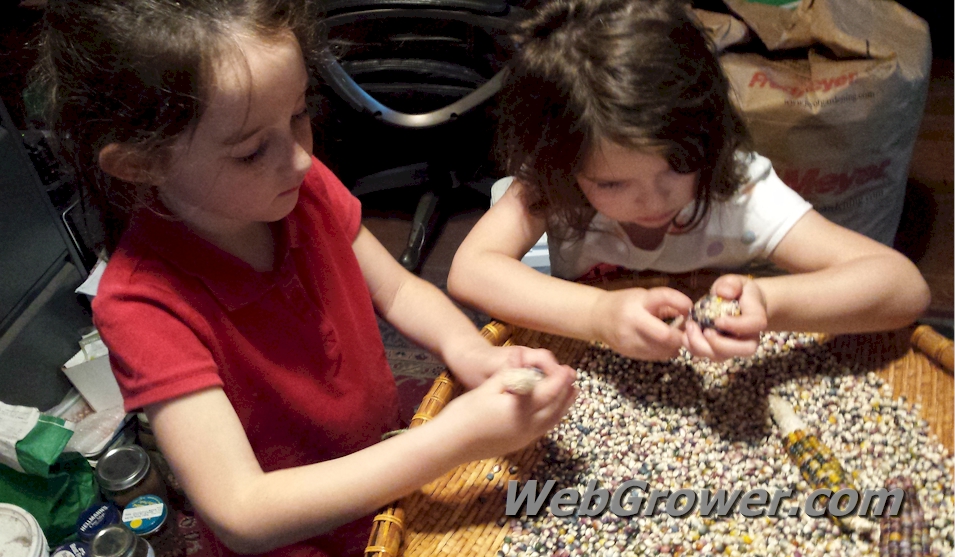
Figure 7: Kids hand shelling ‘Glass Gem’ popcorn kernels. They loved getting the kernels off of the cobs at this age. Another opportunity for teaching children the cycles and connectedness of nature, gardening, and how their food is produced.
The simplest method of shelling corn is to barehand them. It literally is a job so easy that even small kids can do it. However, since rubbing kernels off of the cobs does cause friction and eventually blisters, mechanical methods are employed when you have a lot of ears to do.
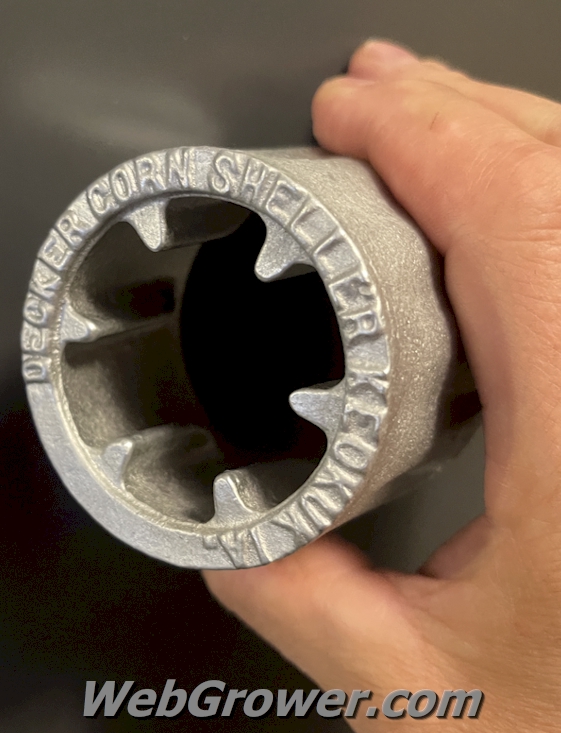
The first step that I always do is to use the sharp point of a penknife to dislodge and discard any discolored, deformed, undeveloped, small, or damaged kernels from the ear that I am about to shell. If I have less than a couple hundred ears of corn to shell, my preferred tool is an inexpensive, sturdy, handheld, metal device called a Decker Corn Sheller. It is simply placed over the ear and twisted. I hold the ear over a 5-gallon bucket as I do this so that the kernels are captured.
Figure 8: A Decker Corn Sheller. It definitely speeds up the work, and at the same time, saves wear and tear on your hands! It should be noted that these devices work with standard sized ears. A different device is required for smaller diameter ears, such as many dwarf and popcorn varieties.
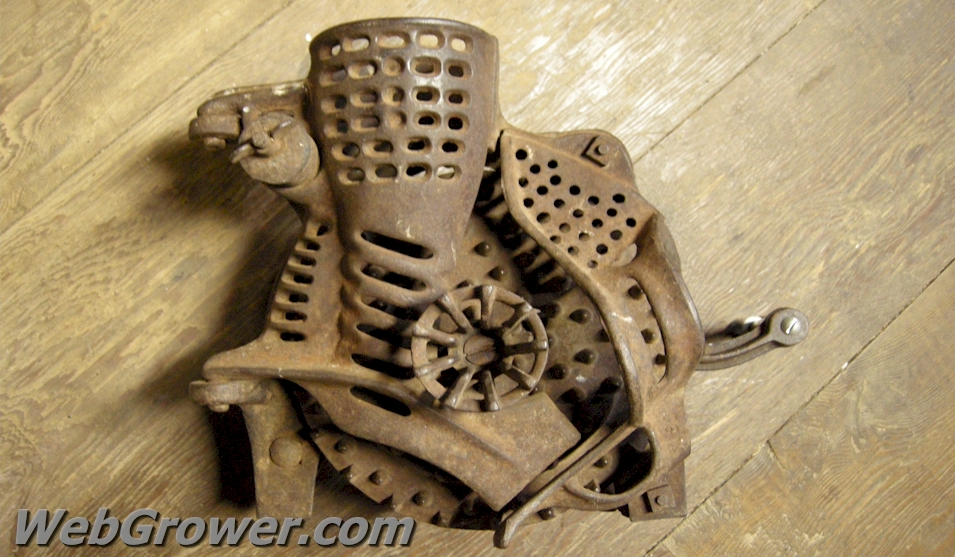
Figure 9: If you need to shell hundreds of ears, investing in a mechanized corn sheller might be worth your while. The example in this photo is one that I bought used many years ago and it has served me well.
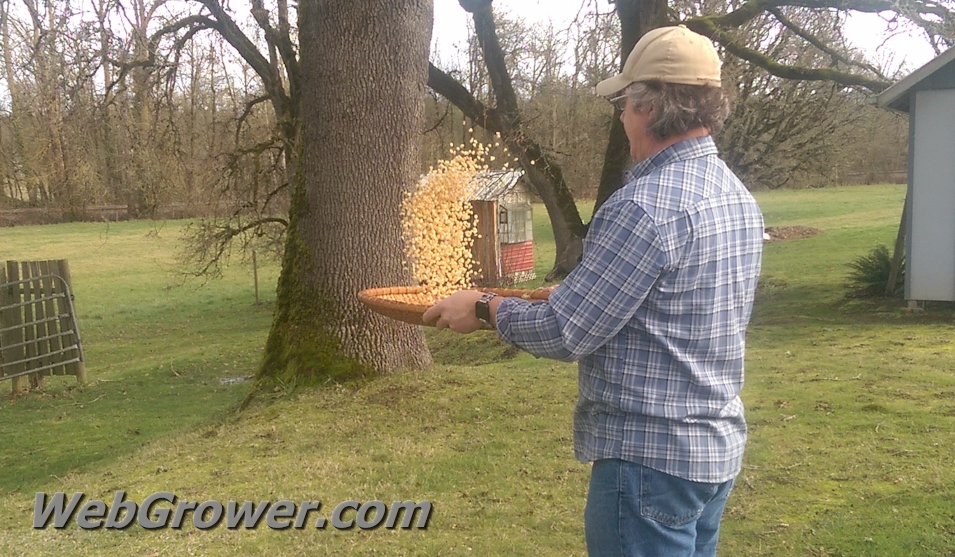
Figure 10: The author using an old, flat, woven basket to hand winnow corn seed outdoors using a gentle breeze.
The next step is to winnow the corn seed. The simplest means of doing this is illustrated in Figure 8. It is accomplished by choosing a dry, mildly breezy day, taking small amounts of the seed that you shelled, and using some form of flat tray, in my case a tightly woven basket, and tossing the seed up letting the breeze blow out all of the debris, silk, and light immature seeds. I still use this method if I am cleaning any amount under about 25 pounds. If there is a lot of seed to clean, I will set up a specialized piece of equipment, but that is generally not necessary for gardeners and small farmers, and beyond the scope of this article.
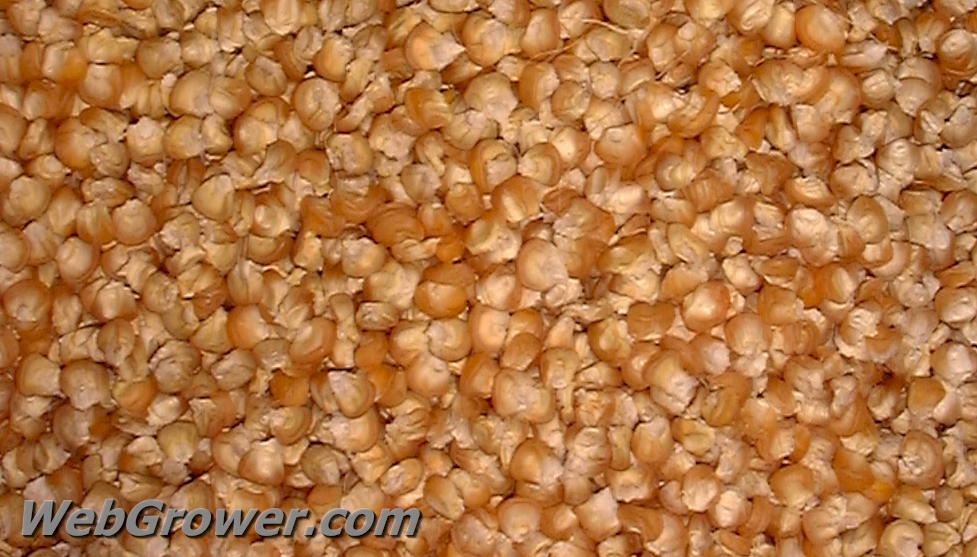
Figure 11: The fruits of labor … beautiful, high quality corn seed.
Storage:
If you saved a small amount of seed, which you plan to plant over the next year or two, place your seeds in an airtight container with a little desiccant packet and keep in a cool, dark, dry place (like the back of the refrigerator). Refer to our article on seed storage for more information.
If you have produced enough seed to meet your gardening needs for many years, and you have access to a good chest deep freezer, consider freezing your excess. One qualifier there is that they absolutely need to be dried as described, or the process of freezing will damage them at the cellular level. Additionally, the freezer cannot be a “frostless” type commonly found as part of a refrigerator / freezer unit. Dedicated, chest-type freezers are desired for long-term storage.
Under generally good storage conditions, corn seed should remain viable for 2 to 4 years. If dried and stored properly under constant refrigeration, a decade would not be unusual. If you properly prepare and freeze your seed, well, let’s just say that I have seed frozen decades ago whose germination rates are comparable to their rates at the time they entered the freezer.
Additional Information:
- For general information on how to grow corn, refer to our article entitled, “Tips for Growing Corn.”
- Maize Genetics & Genomics Database
- For one of the best collections of rare and interesting varieties of corn seeds, check out the Victory Seed Company.
- Why is corn diversity important? Check out this article entitled, “Corn Disease Panics Stock Market, U.S. President.”
Mike Dunton is an "heirloom seed pioneer" who founded, and is the former owner of, the Victory Seed Company. As a seed professional, biodiversity preservationist, horticultural historian, technologist, farmer, gardener, homesteader, writer, and educator, he has worked for decades to share the knowledge and experience that he has gained over a lifetime of trial and error. He strives to pass down his passion for incorporating "old-timey skills" into our everyday, modern lives.
Copyright © 1998 - 2025 - All rights reserved
WebGrower.com℠ is a service mark of Victory Horticultural Group, LLC.
• Privacy Statement •
This site participates in the Amazon Services LLC Associates Program, an affiliate advertising program designed to provide a means for sites to earn advertising fees by advertising and linking to amazon.com.
